VB NET removing Items from ListBoxes in 2024
Inhaltsverzeichnis
I welcome you to todays post considering removing items from listboxes in VB NET.
It’s one of the daily bread and butter tasks of developing Visual Basic NET applications.
No matter if you are displaying a list of customers, or some sort of an address book.
Even something like bills could be displayed using the good old fashioned listbox control in VB NET.
But there’s more to keep in mind, when using the listing control number 1 as well.
One big thing to think about, is how you actually want to display your data.
Sometimes the ListBox control won’t just be enough – regarding the available space.
The key takeaway here will be your actual data itself, making you able to choose the right form of presentation.
It all starts by like how deeply structured or how complex your data is nested behind the scenes.
There will be some easy cases, where you can just display some kind of names like „Lastname, Firstname“.
But there will also be cases, where you will have more complex data like relations between objects.
At this point, let’s not bother about that too much, we will just go ahead diving straight into this post!
Adding elements to a listbox

Well, I think before we can actually talk about removing items from the listbox control, we actually need to add some first.
Just like removing – as you will see in some seconds – adding items to a listbox isn’t very hard either.
Theres a good old function called „add“ on every listbox instance, so let’s go ahead and use it.
When working with controls as usual, you just need to call that listbox by its name and say, what you want to do.
In this case we want to add an item first, so go ahead and use a variable, or call the add function with a string literal.
Actually I need to kinda correct my first statement, because we’re not really adding to the listbox itself.
Instead, we will use the „Items„-property of the listbox, which is an „ObjectCollection„-type.
This type makes us that shiny and easy „add„-function available!
Dim itemOne = "My first item!"
lbListing.Items.Add(itemOne)
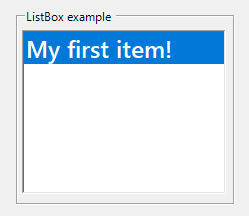
Letting Visual Studio execute this statement in for example the debug mode, our listbox will now look like this:
Let’s go one step further by generating more items, but kinda automated, not manually!
We will use an easy For-Loop for that:
For i = 1 To 5
  lbListing.Items.Add($"Item {i}")
Next
If you are not familiar with that dollar sign thingy: That’s called string interpolation.
I will can writing those annoying „&„-chains like this, pretty neat huh!?
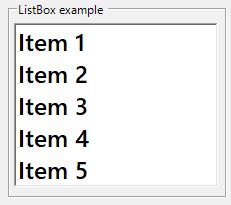
Then our much more filled listbox will look like this:
VB NET removing an item from a listbox, again

So now that we have populated our listbox with some kind of one dimensional data, we will remove it again.
For this to work, we will have to call other functions, which reside inside the „ObjectCollection“-type.
We can choose one of the following functions for this:
The first method „remove„, will only remove an entry by the corresponding object itself.
„RemoveAt“ will drop the item located at a specific position from the listboxes collection behind.
Removing a single item from a listbox by index
So we will just go ahead and use that „RemoveAt“ function to remove an item from the listbox like this:
lbListing.Items.RemoveAt(2)
Keep in mind, that those numbers are zero based, so when talking about „2“ we actually mean the third element.
I took that third element on purpose, because the first one would’ve been boring.
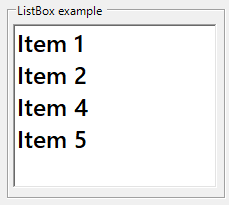
As you can see now, the „Item 3“ entry inside that listbox is now removed:
Removing multiple listbox items with a loop
Removing the first element would be boring, unless we would do it in some kind of loop.
So let’s just try to remove the first 3 items by calling that „RemoveAt“ function – you guessed it – 3 times in a row.
Don’t exaggerate here, or you will get some kind of index error!
For i = 1 To 3
  lbListing.Items.RemoveAt(0)
Next
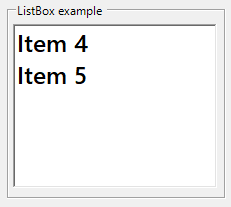
How to remove all listbox items at once
Maybe you’re asking yourself now, how you could actually remove all listbox items at once.
Well, maybe this is even the easiest example, because you don’t need to play with like indices.
Just use that nice „Clear„-function, but be careful to call it on the „Items„-property, not on the listbox itself.
lbListing.Items.Clear()
Removing a specific string item value from the listbox
The last question could be, how to target a special string value like „Item 3“.
This isn’t really hard either, just use the correct method for that:
lbListing.Items.Remove("Item 3")
Warning when working with objects
When working with listboxes in combination with objects, it’s a bit different.
Then you will be better off, by actually using databinding on the listbox and the corresponding datasource.
With this approach, you can focus on working on your source behind, an not on that listbox itself.
This will be a part of another blog post!
Conclusion

So in todays blog post, I’ve showed you how to first create some items inside a listbox.
Then we continued on how to remove the items again.
We used different styles and methods to actually remove those items from the listbox.
At first, we used a method, to remove items by the corresponding index.
After that we tried on using some kind of loop, to do some iterative deletion operation.
Finally, we just figured out, how we can remove a specific string-ish value from the listbox items, to be more clear on the target.
Downloads
No downloads available for this post, sorry!
