How to change the Visual Studio installer language
Inhaltsverzeichnis
Using an other language for the Visual Studio installer
So yesterday I was doing my usual stuff like programming, blogging – and yes – gaming as well. While blogging I stumbled upon a problem when I was just taking some screenshots for my readers. I opened the Visual Studio installer, but I noticed, that it was displayed in german (my native language). My Visual Studio IDE is configured to be displayed in english though, but the installer wouldn’t take this setting – hmm. Follow me on today’s blog post to find out, how to change the Visual Studio installer language!
In short: To change the language of the Visual Studio installer: Find your installer location, „cd“ into its directory using a command prompt and run the setup.exe with for example „–locale en-US“ to choose the english language. Take care that it’s a double dash in front of the locale, but I can’t get it working to display correctly here.
 Gotta go fast, right!? If you’re in a hurry, just go to the specific section, to see how you can change the language of the Visual Studio installer.
Changing the language for Visual Studio IDE itself
Before we take a look at changing the language for the installer, we will check out Visual Studio itself. I want to be like complete here, so maybe it can already help you as well! Make sure, that you have your Visual Studio opened right now.
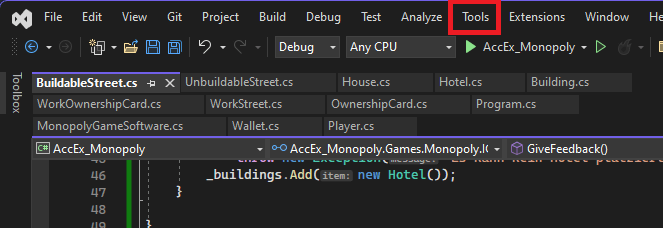
1. Go to „Tools“
First, take a look at the top menu and click „Tools“. Please don’t get confused by the background project I have created for my students.
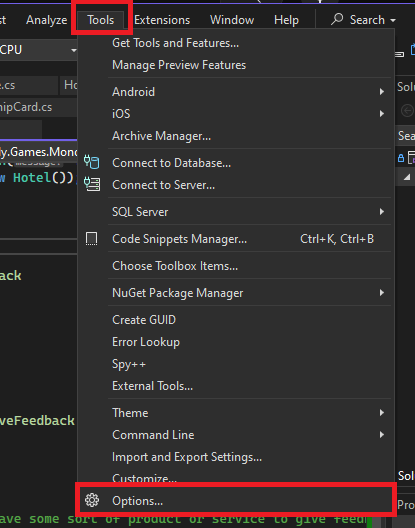
2. Click „Options“
In the next step, you can click the „Options“ menu item. This will open the global settings for Visual Studio.
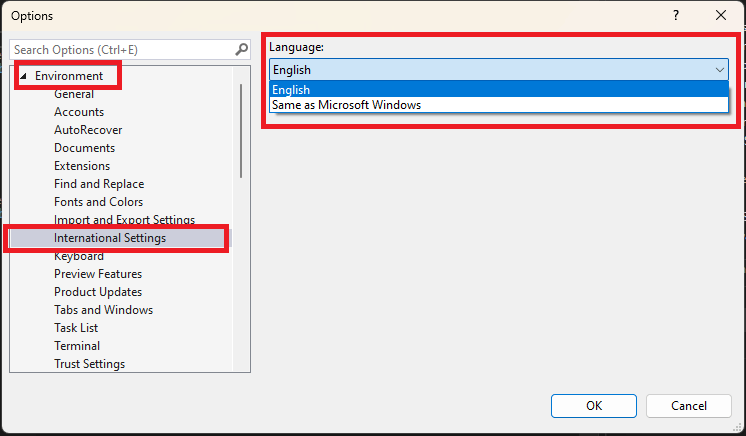
3. Changing the language
Now you can go to the menu item called „Environment“ and the sub item „International Settings“. Then you will find a view where you can now select the desired language inside the corresponding combobox. Keep an eye on the interesting „Same as Microsoft Windows“ setting.
3b. Install more languages
Keep in mind, that the previous dialog will only list available languages. If you need more languages, you can follow the provided hint and add more languages to your system.
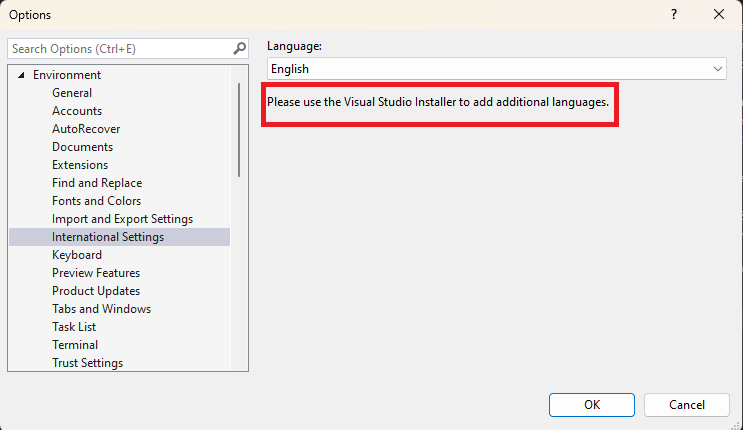
Installing additional languages through the Installer
After I’ve shown how you can change the languages for the Visual Studio IDE itself, we will now take a look at installing more languages (if needed). This can be done by the Visual Studio installer. Make sure you have the installer on your system and open it at this point.
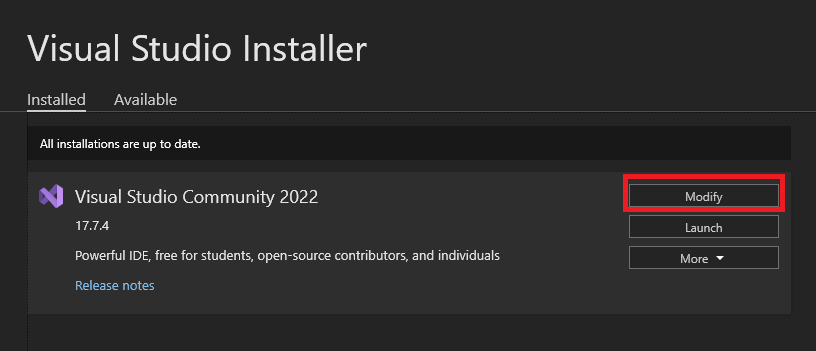
Right now, you should have your Installer executable open and it should look like the following. Click on the „Modify“ button corresponding to your Visual Studio installation.
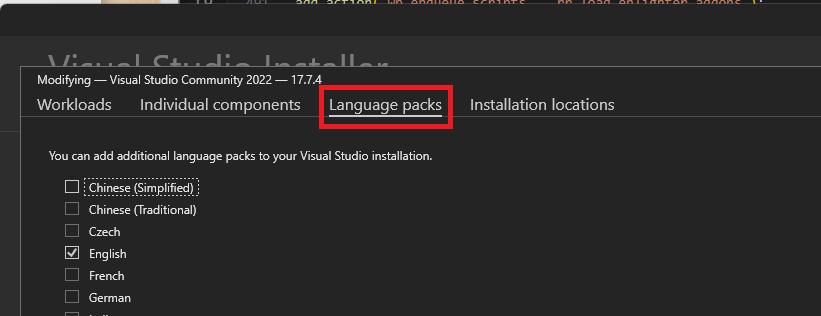
After that, the following screen will appear where you can actually choose the tab called „Language Packs“. And guess what, there you can install more languages! Choose the ones you need, confirm everything and let that thing do its work.
Changing the language of the Visual Studio installer
Sorry for the blabla, but this is (sadly) how the web works, right? In this section we can finally get to our overall goal – changing the Visual Studio installers language. Keep in mind, that there are pretty different versions of VS as well as the installer itself, so there could be different approaches here.
I will show you the way that will work for Visual Studio 2022 and the installer version „3.7.2181.36443“ though. If you have a different version and got it working, feel free to contact me or make a comment so I can add it for others.
1. Find the executable of your installer
The first step to get going is to find the location of your Visual Studio installer executable. This can be easily done by pressing your „Windows“ button on your keyboard and enter something like „installer“. This will most probably show the installer of Visual Studio. Then make a right click and choose „show file location“ – sorry, I only have the german version here.
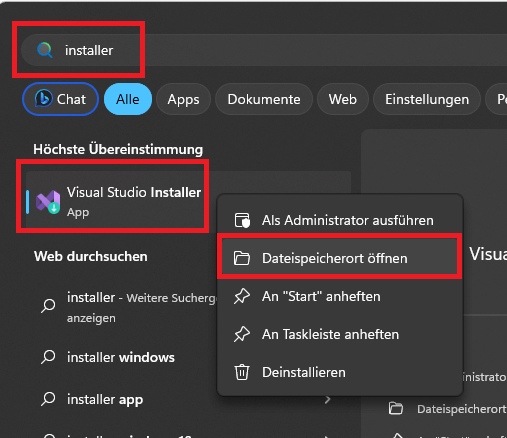
Then you can do the same for this entry here – so do a right click as well and the select „show file location“ or something alike.
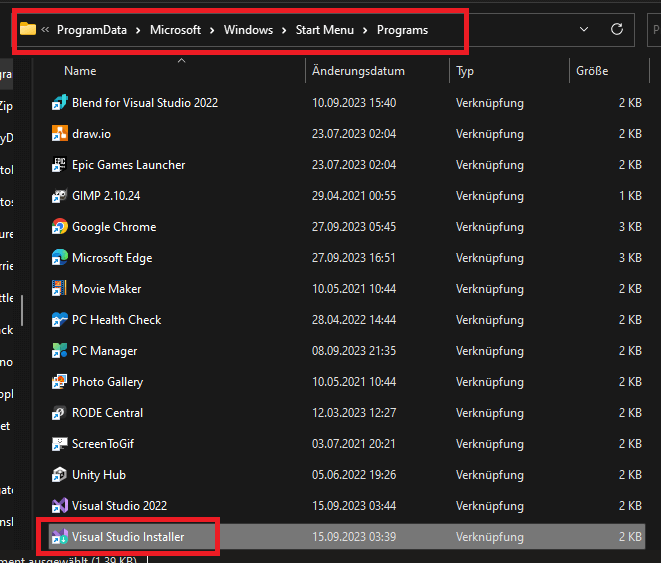
Mine can be found at the following location:
C:\Program Files (x86)\Microsoft Visual Studio\Installer\setup.exe
The rest is pretty easy now, just open a new command line window by pressing the windows button and entering „cmd“ – confirm with enter. Then go into the discovered directory from the past step:
cd "C:\Program Files (x86)\Microsoft Visual Studio\Installer\"
Finally you can run the installer configured with another language like in the below code example. The „en-US“ stands for the locale you want to pick. You could also for example choose „de-DE“ for the german language.
setup.exe --locale en-US
In my tests the selected language locale was actually remember, so I didn’t have to do it like this every time!
More
At the end, I would like to suggest you a few more interesting blog posts. Maybe they can help you a bit with building even cooler .NET apps. Thanks for reading!
