A bluetooth phone call in C# & VB.NET

Inhaltsverzeichnis
- 1 Dialing a phone number using bluetooth in .NET
- 2 Why would you want to call somebody through .NET?
- 3 Installing the package – nobody wants to reinvent the wheel
- 4 Creating a simple user interface for our bluetooth phone call
- 5 The call itself – using the BluetoothClient class
- 6 Full code & refactoring – bluetooth phone call
- 7 Downloads
Dialing a phone number using bluetooth in .NET
Did you ever want to be able to actually make a phone call with C# or VB.NET using bluetooth? Well, then I got some good news for you! In today’s blog post, we will talk about using the bluetooth technology to start dialing a phone / mobile number from within your own .NET app.
In general: Calling somebody from your .NET app can be easily done by installing a package called „32feet.NET“. Use the „BluetoothClient“ class to connect to a specific bluetooth device and finally send those commands of interest. This will instruct your phone to actually call the number and you’re done.
Sounds too hard? Well, no problem, just dive deeper into this blog post, where I will explain everything you need – for C# and VB.NET. If you are rather interested in listing / searching for bluetooth devices, feel free to take a look that blog post as well! Keep in mind, that I (almost) always provide an example application for you to download and test. Just scroll down a bit, or use the table of contents from above.
Why would you want to call somebody through .NET?
In today’s (digital) age – especially considering user experience – everything is about efficiency and intuivity. I mean, you don’t want to take 10 steps to finish a task, when it could’ve been done in like 3, right? Considering my own software, this was one of the main arguments of many customers, why they’ve chosen my software over others.
Imagine creating a CRM (customer relationship management) software, where your users would actually need to pull out there phone to call someone – meh! It would be a lot better, if they could just click a small button inside your app, to call their client, right!? I mean, for most persons this would basically be like a „standard functionality“, but I’ve seen a lot apps, where this wasn’t the case at all, so..
Installing the package – nobody wants to reinvent the wheel
Imagine, you would have to build everything yourself, before using it: Your car, your phone itself, even your whole house. That wouldn’t be pretty much amusing, right? It’s just like that for us developers. I mean, I love exploring custom things and digging codes, this is why I am a software developer in the first place, but I don’t want to build everything from scratch.
Thank god (or the devs I guess?), that there are some nice dudes and dudettes, who actually make functionality easily available for fellow developers. This will be the case for our scenario as well, as we will be using a known NuGet library. In the end, everyone has to decide himself/herself, if using existing this provide more value than creating it yourself.
Opening the NuGet Package Manager
So, please go ahead and open the NuGet package manager inside your Visual Studio application. Don’t get confused, as I’m using my german Visual Studio installation here. Just use the first tab on the left side saying like „search“.
Next, search for „32feet.NET“ and install this package inside of your existing application / project. For sure, you need to take care, that this package matches your .NET version / setup. This package should work for a usual WPF as well as a Windows Forms application.

Creating a simple user interface for our bluetooth phone call
After you’ve successfully completed the previous step, we can now focus on the UI part of our little example application. We won’t create like a complex UI, as this would be overkill and not really expedient. Actually, we will just put a simple button on our Form / Window – depending on the project type being Winforms or WPF.
Staying with the „simple“ part, I won’t create something like a ViewModel (which would be typical for WPF apps). If you don’t have a WPF project anyways – just ignore, what I’ve just said.
Please put a simple button on your Form / Window and go into the typical click event handler by double clicking the button in like Windows Forms (or using something similar, like the designer dropdown..). If you’re using WPF, just go into your XAML code and specify the „Click“ attribute for the button. This will show a little prompt, asking you, if it should create a handler for you.
We will need some sort of input for the phone number to dial as well. Please make sure, that you’ll also add some sort of textbox and a label to make the purpose of the textbox clear.
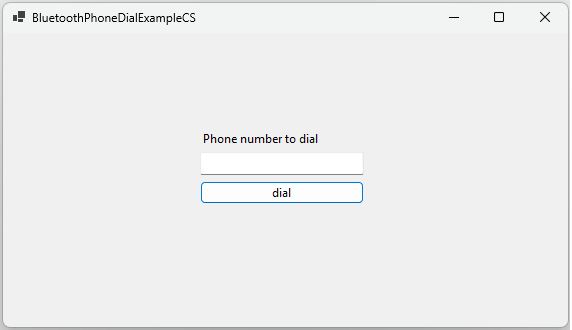
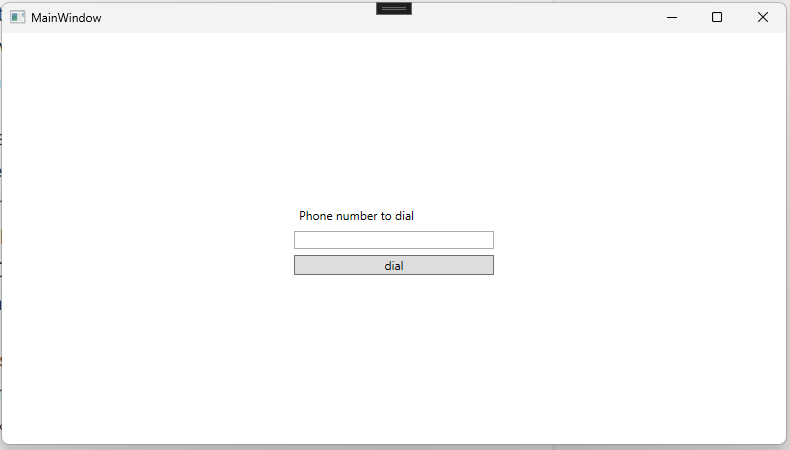
Currently your app should therefore look like something like this. For sure, you could also like create a complete example with single dialing buttons, being single digits.
Windows Forms
If you are using windows forms, take a look at the following example.
Winforms UI example

WPF
When you are however using Windows Presentation Foundation (WPF), just peek at this example. Again, keep in mind, that I’m not using MVVM, etc. for this simple example, just plain old view and code mixing.
WPF UI example

XAML code
<Window x:Class="WpfExample.MainWindow"
        xmlns="http://schemas.microsoft.com/winfx/2006/xaml/presentation"
        xmlns:x="http://schemas.microsoft.com/winfx/2006/xaml"
        xmlns:d="http://schemas.microsoft.com/expression/blend/2008"
        xmlns:mc="http://schemas.openxmlformats.org/markup-compatibility/2006"
        xmlns:local="clr-namespace:WpfExample"
        mc:Ignorable="d"
        Title="MainWindow" Height="450" Width="800" WindowStartupLocation="CenterScreen">
    <Grid>
        <StackPanel Width="200" HorizontalAlignment="Center" VerticalAlignment="Center">
            <Label Content="Phone number to dial" Margin="0 0 0 3" />
            <TextBox Name="tbPhoneNumber" Margin="0 0 0 6" />
            <Button Content="dial" Click="Button_Click" />
        </StackPanel>
    </Grid>
</Window>
The call itself – using the BluetoothClient class
After we have created a small user interface in the previous step, we will now fill up some code. As already explained, you should already have some sort of button click handler available. If not, just create one as usual..
Depending on your used technology (Winforms / WPF), take care for naming the following void / sub correctly. The WPF button click handler from above was called „Button_Click“. If you are using Winforms, there should be no problem at this point.
Next, mark your handler function async, as we will be using an async variant. I mean, we don’t want to act like as we are 20 years back in time. That means, having too much synchronous code – which should be async –, to avoid lagging our app and therefore creating a bad user experience.
The BluetoothClient – building our communicator
After preparing our eventhandler, we can now create a BluetoothClient instance of the installed library. This will enable interacting with the bluetooth device. Please make sure, that the device is already paired with the computer. Now, go ahead and create the BluetoothClient (which resides in the „InTheHand.Net.Sockets“-namespace) instance.
Then we will use a specified device, to actually call the specified phone number. As mentioned above, please also refer to my blog post considering listing / searching bluetooth devices. To do so, we first need to connect to the specified device. After that, we can now obtain a stream, which enables us writing data (via Bluetooth) to the target device.
// somewhere on top / above the form
using InTheHand.Net;
using InTheHand.Net.Bluetooth;
using InTheHand.Net.Sockets;

private async void btnDialNumber_Click(object sender, EventArgs e)
{
    BluetoothAddress address;
    // if you know the device (BluetoothDeviceInfo) -> device.DeviceAddress
    // address = device.DeviceAddress;
    // if you know the address -> BluetoothAddress.Parse / TryParse
    // address = BluetoothAddress.Parse("...");
    using var bluetoothClient = new BluetoothClient();
    await Task.Run(() => bluetoothClient.Connect(address, BluetoothService.Handsfree));
    // send data to the device..
}
' somewhere on top / above the form
Imports InTheHand.Net
Imports InTheHand.Net.Bluetooth
Imports InTheHand.Net.Sockets

Private Async Sub btnDialNumber_Click(ByVal sender As Object, ByVal e As EventArgs)
    Dim address As BluetoothAddress
    ' if you know the device (BluetoothDeviceInfo) -> device.DeviceAddress
    ' address = device.DeviceAddress;
    ' if you know the address -> BluetoothAddress.Parse / TryParse
    ' address = BluetoothAddress.Parse("...");
    Using bluetoothClient = New BluetoothClient()
        Await Task.Run(Function() bluetoothClient.Connect(address, BluetoothService.Handsfree))
    End Usin
End Sub
Take care, that I’m using the newer C# syntax for the „using“ statement, which I personally prefer over the old one. I’m using the Task.Run method to offload the creation of the connection to the threadpool, making it async / non-laggy.
Calling & sending data over Bluetooth
Right now, we already finished the most important steps, so the next ones are basic operations like „do this, do that“. For sure, Bluetooth and the corresponding devices have their own „language“ / protocol for that. I’m no bluetooth command „pro“, to be honest. ..but well, I could get it working, specifying the – soon – following commands. If you made any findings yourself, feel free to leave a comment in the section below the blog post.
Next, we will get the data stream, where we can send our own text based commands. For this, we will (like most of the time, when using streams) use the Write / Flush method variants. At the end, we could read the response data and handle the different responses.
// ... previous code
private async void btnDialNumber_Click(object sender, EventArgs e)
{
    // ... previous code
    var phoneNumber = "<the phone number you want to call like 0157.....>";
    using var stream = bluetoothClient.GetStream();
    var cmds = new List<string>()
    {
        "AT+CMER\r",
        "AT+CIND=?\r",
        "AT+BRSF=\r",
        $"ATD{phoneNumber};\r"
    };
    foreach (var cmd in cmds)
    {
        Debug.WriteLine($"sending: {cmd}");
        var cmdData = Encoding.ASCII.GetBytes(cmd);
        await stream.WriteAsync(cmdData);
        await stream.FlushAsync();

        // could be coming from a pool, but for demo..
        var buffer = new byte[1024];
        var readResponseByteCount = await stream
            .ReadAsync(buffer, 0, buffer.Length);
        var responseData = buffer
            .Take(readResponseByteCount)
            .ToArray();
        var responseText = Encoding
            .ASCII
            .GetString(responseData)
            .Trim();
        // do something with the response
    }
}
Private Async Sub btnDialNumber_Click(ByVal sender As Object, ByVal e As EventArgs)
    Dim phoneNumber = "<the phone number you want to call like 0157.....>"

    Using stream = bluetoothClient.GetStream()
        Dim cmds = New List(Of String)() From {
            "AT+CMER" & vbCr,
            "AT+CIND=?" & vbCr,
            "AT+BRSF=" & vbCr,
            $"ATD{phoneNumber};\r"
        }

        For Each cmd In cmds
            Debug.WriteLine($"sending: {cmd}")
            Dim cmdData = Encoding.ASCII.GetBytes(cmd)
            Await stream.WriteAsync(cmdData)
            Await stream.FlushAsync()
            Dim buffer = New Byte(1023) {}
            Dim readResponseByteCount = Await stream.ReadAsync(buffer, 0, buffer.Length)
            Dim responseData = buffer.Take(readResponseByteCount).ToArray()
            Dim responseText = Encoding.ASCII.GetString(responseData).Trim()
        Next
    End Using
End Sub
Full code & refactoring – bluetooth phone call
If you want to make your code more reusable (or at least begin with it), I would encourage you to create a fitting class. This would increase performance (a little) as well, because we could use „ConfigureAwait(false) “ more easily. I will keep my dev comments inside the code, maybe it helps you, when you’re thinking about the code.
using InTheHand.Net.Bluetooth;
using InTheHand.Net.Sockets;
using System.Collections.Generic;
using System.Diagnostics;
using System.Linq;
using System.Text;
using System.Threading.Tasks;

namespace BluetoothPhoneDialExampleCS.Models;

public class BluetoothPhone
{

    public async Task CallAsync(BluetoothAddress bluetoothAddress, string phoneNumber)
    {
        //var bluetoothAddress = BluetoothAddress.Parse("E0897EE5FBEE");
        //var endPoint = new BluetoothEndPoint(bluetoothAddress, BluetoothService.Handsfree);
        using var client = new BluetoothClient();
        //await Task.Factory
        //   .FromAsync(client.BeginConnect, client.EndConnect, device.DeviceAddress, BluetoothService.Handsfree, null)
        //   .ConfigureAwait(false);
        await Task.Run(() => client.Connect(bluetoothAddress, BluetoothService.Handsfree))
            .ConfigureAwait(false);
        using var stream = client.GetStream();
        var cmds = new List<string>()
        {
            "AT+CMER\r",
            "AT+CIND=?\r",
            "AT+BRSF=\r",
            $"ATD{phoneNumber};\r"
        };
        // AT+CMER
        // enables or disables unsolicited result codes related to MT events
        // AT+CIND
        // used to get the current indicator values
        // AT+BRSF=
        // hands-free (HF) devices  report supported features and request the phone's audio gateway (AG)
        foreach (var cmd in cmds)
        {
            Debug.WriteLine($"sending: {cmd}");
            var cmdData = Encoding.ASCII.GetBytes(cmd);
            await stream
                .WriteAsync(cmdData)
                .ConfigureAwait(false);
            await stream
                .FlushAsync()
                .ConfigureAwait(false);

            // could be coming from a pool, but for demo..
            var buffer = new byte[1024];
            // SocketException 10055!
            var readResponseByteCount = await stream
                .ReadAsync(buffer, 0, buffer.Length)
                .ConfigureAwait(false);
            var responseData = buffer
                .Take(readResponseByteCount)
                .ToArray();
            var responseText = Encoding
                .ASCII
                .GetString(responseData)
                .Trim();
            Debug.WriteLine($"response: `{responseText}`");
        }
    }

}
Imports InTheHand.Net.Bluetooth
Imports InTheHand.Net.Sockets
Imports System.Collections.Generic
Imports System.Diagnostics
Imports System.Linq
Imports System.Text
Imports System.Threading.Tasks

Namespace BluetoothPhoneDialExampleCS.Models
    Public Class BluetoothPhone
        Public Async Function CallAsync(bluetoothAddress As BluetoothAddress, phoneNumber As String) As Task
            Using client = New BluetoothClient()

                Await Task.Run(Function() client.Connect(bluetoothAddress, BluetoothService.Handsfree)).ConfigureAwait(False)

                Using stream = client.GetStream()
                    Dim cmds = New List(Of String)() From {
                        "AT+CMER" & vbCr,
                        "AT+CIND=?" & vbCr,
                        "AT+BRSF=" & vbCr,
                        $"ATD{phoneNumber};\r"
                    }

                    For Each cmd In cmds
                        Debug.WriteLine($"sending: {cmd}")
                        Dim cmdData = Encoding.ASCII.GetBytes(cmd)
                        Await stream.WriteAsync(cmdData).ConfigureAwait(False)
                        Await stream.FlushAsync().ConfigureAwait(False)
                        Dim buffer = New Byte(1023) {}
                        Dim readResponseByteCount = Await stream.ReadAsync(buffer, 0, buffer.Length).ConfigureAwait(False)
                        Dim responseData = buffer.Take(readResponseByteCount).ToArray()
                        Dim responseText = Encoding.ASCII.GetString(responseData).Trim()
                        Debug.WriteLine($"response: `{responseText}`")
                    Next
                End Using
            End Using
        End Function
    End Class
End Namespace
Downloads
Are you pretty much tired off, of copying and pasting code manually? Well, I got you covered! Please feel free, to download the matching example application for your needs and test without further delay.
The projects (VB / C#) will contain WPF, as well as the Windows Forms apps.
